Lighting is a fundamental aspect of videography that can significantly influence the quality and mood of your video content. Whether you’re shooting a YouTube tutorial, a corporate video, or a short film, understanding how to manipulate light effectively can elevate your production value. This article explores essential lighting techniques and setups to help you achieve professional-looking results.
Lighting is a fundamental aspect of videography that can significantly influence the quality and mood of your video content. Whether you’re shooting a YouTube tutorial, a corporate video, or a short film, understanding how to manipulate light effectively can elevate your production value. This article explores essential lighting techniques and setups to help you achieve professional-looking results.
The Importance of Lighting
Good lighting not only enhances the visual appeal of your videos but also sets the tone and mood. Poor lighting can lead to unflattering shadows, washed-out colors, and an overall amateur appearance. By mastering lighting techniques, you can ensure that your videos look polished and engaging, capturing your audience’s attention effectively.
1. Utilize Natural Light
Natural light is one of the best and most cost-effective lighting sources available. Here are some tips for maximizing its use:
Timing: Shoot during the golden hours—early morning or late afternoon—when the sunlight is softer and more flattering.
Placement: Position your subject facing the light source to avoid harsh shadows on their face. Use reflectors to bounce light back onto the subject for a more even illumination.
Limitations: Be mindful of changing light conditions, especially if you’re shooting outdoors. Always have a backup plan, such as portable lights, in case the natural light diminishes.
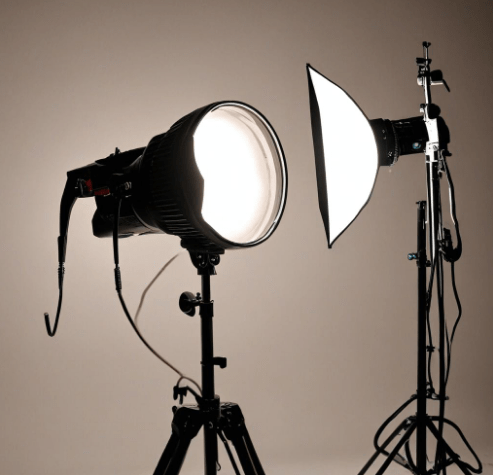
2. Three-Point Lighting Setup
The three-point lighting setup is a classic technique used in videography to create depth and dimension. It consists of three lights:
Key Light: The primary light source, usually placed at a 45-degree angle to the subject. This light should be the brightest and is responsible for defining the subject’s features.
Fill Light: Positioned opposite the key light, the fill light softens shadows created by the key light. It is typically less intense and helps achieve a balanced look.
Backlight: Also known as a hair light, this light is placed behind the subject, separating them from the background and adding depth. It creates a subtle highlight around the subject, enhancing the three-dimensional effect.
3. Experiment with Different Lighting Styles
Different lighting styles can dramatically change the mood of your video. Here are a few to consider:
Loop Lighting: This technique creates a small shadow of the subject’s nose on their cheek, adding dimension without being overly dramatic. It’s great for interviews and talking head videos.
Butterfly Lighting: Positioned directly in front of and above the subject, this setup creates a butterfly-shaped shadow under the nose, ideal for beauty shots and glamour photography.
High-Key Lighting: This style uses bright lights to minimize shadows, creating a cheerful and upbeat atmosphere. It’s commonly used in comedies and promotional videos.
4. Avoid Overhead Lighting
Overhead lighting, such as ceiling fixtures, can create unflattering shadows on the subject’s face. Instead, opt for adjustable lamps or LED panels that can be positioned in front of or to the side of the subject. This allows for more control over the lighting and helps to create a more flattering look.
5. Consider Color Temperature
Matching the color temperature of your lights is crucial for maintaining consistency throughout your video. Most indoor lights have a warm color temperature (around 2700K), while daylight is cooler (around 5600K). Use gels or adjustable LED lights to balance the color temperatures and avoid color correction issues during post-production.
6. Use Diffusers and Reflectors
To soften harsh light and create a more natural look, consider using diffusers. These can be as simple as a white sheet or a professional diffusion panel. Reflectors can also help bounce light onto your subject, filling in shadows and creating a more balanced illumination.
7. Test and Adjust
Always conduct test shots before starting your main shoot. This allows you to see how the lighting looks on camera and make necessary adjustments. Pay attention to how shadows fall and ensure that your subject is well-lit without any harsh contrasts.
Conclusion
Mastering lighting for videography is essential for producing high-quality content that engages viewers. By utilizing natural light, implementing a three-point lighting setup, experimenting with different styles, and paying attention to color temperature, you can significantly enhance the visual quality of your videos. Remember to test your lighting setup before filming to ensure optimal results. With practice and experimentation, you’ll develop a keen eye for lighting that will elevate your videography skills.
